Deploying NodeJS application on AWS EC2 instance


In this article, we are going to see how one can deploy a NodeJS application on an AWS EC2 Linux instance and access the same in the browser.

Before starting with the actual deployment process let’s have some introduction on the Node.js, AWS, EC2 and Linux AMI.
Node.js
It is a JavaScript runtime environment, written in C++. It allows users to run JavaScript on the server and to create server side applications with JavaScript.

It is mostly used for creating server-side APIs, and command-line tools and real-time applications.
AWS (Amazon Web Services)
AWS is a cloud computing platform which provided by Amazon.

It consists of various remote computing services like Amazon EC2 instances, various types of databases and networking options.
AWS EC2(Elastic Compute Cloud)
Amazon EC2 is Amazon Elastic Cloud Computing. This is a service where Amazon provides us a server where we can deploy our application for absolute minimum cost and it takes a very little time to do so.

By providing the service of AWS EC2 amazon is giving us a easy way to launch our application without worrying about the bare metal hardware stuff and the networking part.
Linux AMI
An Amazon Machine Image (AMI) is a pre-configured virtual machine image, available in the Amazon Web Services (AWS) ecosystem, that is used to launch an instance
A Linux AMI comes pre-installed with a Linux operating system. Some of the most popular Linux distributions available AMIs on AWS are Ubuntu, Amazon Linux.
So the steps that we need to perform here are as follows:
Create a AWS EC2 instance
SSH into the instance
Install NodeJS and NPM
Install Git
Clone the repository from GitHub
Install all the required dependencies
Run the application
Access the application in browser
Now we will start performing all these steps one by one :
1. Create a AWS EC2 instance
As a very first step here in the process we need to configure a AWS EC2 instance and SSH into the same.
To know the process of configuring a EC2 instance please check my previous article on the same.
Here is the Link : “Launching your first EC2 Instance”
Now we will start the procedure of deploying the Node.js application on the newly created EC2 machine.
2. SSH into the instance
The steps to SSH into the EC2 machine has been explained in the previous article. Please check the link provided in 1st point.
After doing SSH into the EC2 instance you need to change the user to the super user by using the command :
#sudo su
so that you won’t have any user permission issues.

3. Install NodeJS and NPM using nvm
Now we need to install nvm (node version manager)by typing the following at the command line.
#sudo su -
curl -o- https://raw.githubusercontent.com/nvm-sh/nvm/v0.34.0/install.sh | bash

Now you need to activate nvm by using the command :
#. ~/.nvm/nvm.sh
By using nvm you have to install Node.js. Put the below command in the command line :
#nvm install 16

Check the nvm and Node.js version by using the commands
#nvm --version


4. Install Git
Now we need to take the source code of the Node.js application from the GitHub so we have to install Git first so that we can clone the particular repository of the Node.js application.
The #yum update -y command is used to update the existing software packages on the machine.
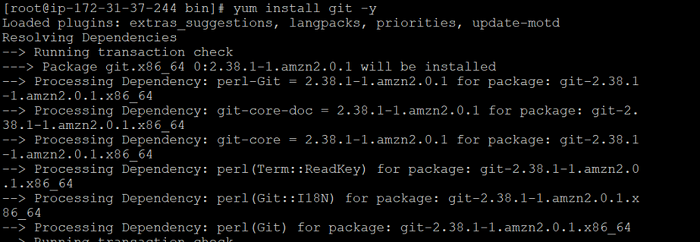
Use the below command to install Git on your machine :
#yum update -y
#yum install git


You can check the version of the Git by putting the command
#git --version

5. Clone the repository from GitHub
After installing Git, now we will clone the repository of the Node.js application.
Use the below command to do so :

This command will clone(creating a copy) the repository on the machine by creating a folder by the name “nodejs-on-ec2”.

Now get into that folder and check the sub folders and files of the Node.js application. Use the command to check the files:
#cd nodejs-on-ec2
#ls -ltr

6. Install all the required dependencies
To install the dependencies use the below command :
#npm install

7. Run the application
To run the application put the below command in the command line :
#node index.js
8. Access the application in browser
As you can see in the repository on the GitHub in the index.js file we have already mentioned to create a http server which is listening on port 80.
So there is no need to doing the port mapping again, as we can easily access the application by using the public IP of the machine and port number 80.
If everything till now is working fine then we will be able to see the application running on the port number 80.
3.134.85.190:80
(public IP of the machine : port 80)
You can see the browser output below :

You can also use the public DNS of the machine to get the access .
http://ec2-3-134-85-190.us-east-2.compute.amazonaws.com/:80
You will get the similar output.