Automate Your Infrastructure Management with GitLab CI/CD for Terraform·
Introduction:-
In today’s fast-paced world of software development and infrastructure management, automation is key to staying competitive and efficient. GitLab CI/CD is a powerful tool that can help you automate your development and deployment pipelines. When combined with Terraform, a popular Infrastructure as Code (IaC) tool, you can achieve a seamless and efficient process for managing your infrastructure. In this blog post, we’ll explore how GitLab CI/CD can supercharge your Terraform workflows.
What is GitLab CI/CD?
GitLab CI/CD is a robust and integrated continuous integration and continuous deployment (CI/CD) platform provided by GitLab. It allows you to automate the building, testing, and deployment of your applications and infrastructure configurations. GitLab CI/CD is particularly popular due to its simplicity, flexibility, and strong version control integration, making it a natural fit for Terraform-based infrastructure management.
Why Choose Terraform for Infrastructure as Code?
Before we dive into how GitLab CI/CD can enhance Terraform workflows, let’s briefly discuss why Terraform is a top choice for Infrastructure as Code:
Declarative Syntax: Terraform uses a declarative language to describe the desired state of your infrastructure, making it easier to read and understand your configuration.
Multi-Cloud Support: Terraform supports various cloud providers, allowing you to manage infrastructure across different cloud platforms consistently.
Modularity: Terraform modules promote reusability and maintainability of code by encapsulating infrastructure components.
State Management: Terraform keeps track of the current state of your infrastructure, enabling you to apply changes incrementally.
Benefits of Using GitLab CI/CD with Terraform
Automation: GitLab CI/CD automates the entire Terraform workflow, from planning and applying changes to infrastructure.
Version Control Integration: GitLab CI/CD seamlessly integrates with your Git repository, ensuring that your infrastructure code and CI/CD pipeline configuration are versioned and tracked.
Security: Securely manage secrets and credentials, reducing the risk of exposure.
Collaboration: Foster collaboration among team members with centralized CI/CD pipelines that are easy to understand and modify.
Scalability: Easily scale your infrastructure with Terraform and manage it with GitLab CI/CD as your projects grow.
Step1: create an IAM user
For this demo we are using “administratorAccess” policy .
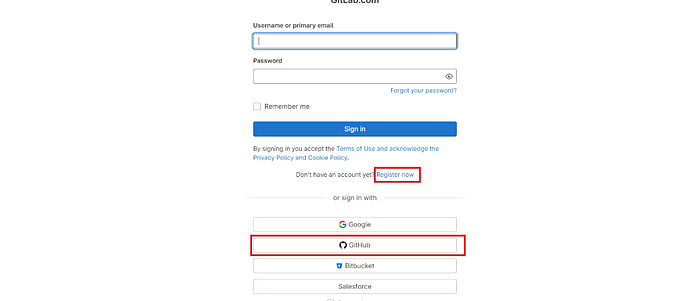
Step2: Create Gitlab Account
Go to https://gitlab.com/
Click on Register now (or)
The easy choice is to click on GitHub it will create an account.
Step3: Terraform Files
Create a blank repository in Gitlab and add these files
 resource "aws_security_group" "Jenkins-sg" {
  name        = "Jenkins-Security Group"
  description = "Open 22,443,80,8080"

  # Define a single ingress rule to allow traffic on all specified ports
  ingress = [
    for port in [22, 80, 443, 8080] : {
      description      = "TLS from VPC"
      from_port        = port
      to_port          = port
      protocol         = "tcp"
      cidr_blocks      = ["0.0.0.0/0"]
      ipv6_cidr_blocks = []
      prefix_list_ids  = []
      security_groups  = []
      self             = false
    }
  ]

  egress {
    from_port   = 0
    to_port     = 0
    protocol    = "-1"
    cidr_blocks = ["0.0.0.0/0"]
  }

  tags = {
    Name = "Jenkins-sg"
  }
}


resource "aws_instance" "web" {
  ami                    = "ami-09a81b370b76de6a2"  #change Ami if you different region
  instance_type          = "t2.medium"
  key_name               = "Tokyo_key"   #change key name
  vpc_security_group_ids = [aws_security_group.Jenkins-sg.id]
  user_data              = templatefile("./install_jenkins.sh", {})

  tags = {
    Name = "Jenkins-sonar"
  }
  root_block_device {
    volume_size = 8
  }
}
terraform {
  required_providers {
    aws = {
      source  = "hashicorp/aws"
      version = "~> 5.0"
    }
  }
}

# Configure the AWS Provider
provider "aws" {
  region = "ap-south-1"     #change to desired region.
}
install_jenkins.sh
#!/bin/bash
exec > >(tee -i /var/log/user-data.log)
exec 2>&1
sudo apt update -y
sudo apt install software-properties-common
sudo add-apt-repository --yes --update ppa:ansible/ansible
sudo apt install ansible -y
sudo apt install git -y
mkdir Ansible && cd Ansible
pwd
git clone https://github.com/Aj7Ay/ANSIBLE.git
cd ANSIBLE
ansible-playbook -i localhost Jenkins-playbook.yml
terraform {
  backend "s3" {
    bucket = "<s3-bucket>" # Replace with your actual S3 bucket name
    key    = "Gitlab/terraform.tfstate"
    region = "ap-south-1"
  }
}
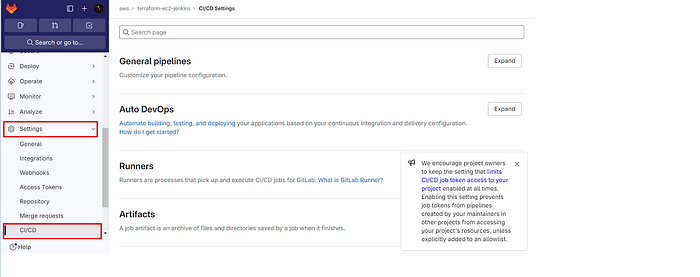
Step4: Variables setup in Gitlab (Secrets)
Inside your repository
Click on Settings → ci/cd
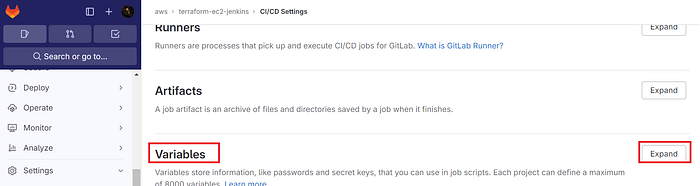
Click on Expand at variables
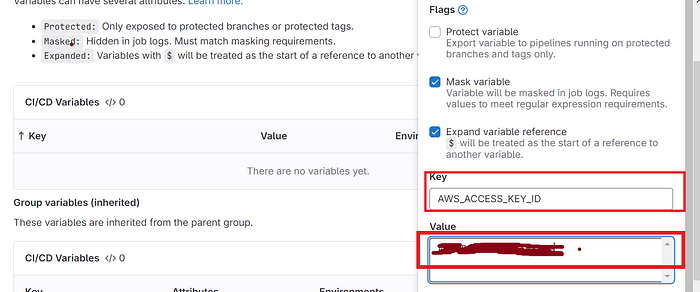
Click on Add variable
Select the Mask variable and expand variable checkboxes
For key use AWS_ACCESS_KEY_ID
For value use the AWS key that is generated for IAM user.
Add variable
The key is added, now for the secret access key

The keys are added.

Step5: GitLab CI/CD configuration
stages:
  - validate
  - plan
  - apply
  - destroy
stages:: This section defines the stages in the CI/CD pipeline. In your configuration, you have four stages: validate, plan, apply, and destroy.
image:
  name: hashicorp/terraform:light
  entrypoint:
    - '/usr/bin/env'
    - 'PATH=/usr/local/sbin:/usr/local/bin:/usr/sbin:/usr/bin:/sbin:/bin'
image:: Specifies the Docker image to use for the GitLab Runner. In this case, you're using the "hashicorp/terraform:light" image for running Terraform commands. The entrypoint lines set the environment to include commonly used paths.
before_script:
  - export AWS_ACCESS_KEY=${AWS_ACCESS_KEY_ID}
  - export AWS_SECRET_ACCESS_KEY=${AWS_SECRET_ACCESS_KEY}
  - rm -rf .terraform
  - terraform --version
  - terraform init
before_script:: This section defines commands to run before each job in the pipeline.
The first two lines export the AWS access key and secret access key as environment variables, which are used for AWS authentication in your Terraform configuration.
rm -rf .terraform: This removes any existing Terraform configuration files and state files to ensure a clean environment.terraform --version: Displays the Terraform version for debugging and version confirmation.terraform init: Initializes Terraform in the working directory, setting up the environment for Terraform operations.
validate:
  stage: validate
  script:
    - terraform validate
validate:: Defines a job named "validate" in the "validate" stage. This job validates the Terraform configuration.
script:: Specifies the commands to run as part of this job. In this case, it runsterraform validateto check the syntax and structure of your Terraform files.
plan:
  stage: plan
  script:
    - terraform plan -out=tfplan
  artifacts:
    paths:
      - tfplan
plan:: This job, in the "plan" stage, creates a Terraform plan.
script:: Runsterraform plan -out=tfplan, which generates a plan and saves it as "tfplan" in the working directory.artifacts:: Specifies the artifacts (output files) of this job. In this case, it specifies that the "tfplan" file should be preserved as an artifact.
apply:
  stage: apply
  script:
    - terraform apply -auto-approve tfplan
  dependencies:
    - plan
apply:: This job, in the "apply" stage, applies the Terraform plan generated in the previous stage.
script:: Runsterraform apply -auto-approve tfplan, which applies the changes specified in the "tfplan" file.dependencies:: Specifies that this job depends on the successful completion of the "plan" job.
destroy:
  stage: destroy
  script:
    - terraform init
    - terraform destroy -auto-approve
  when: manual
  dependencies:
    - apply
destroy:: This job, in the "destroy" stage, is intended for destroying the Terraform-managed resources.
script:: Runsterraform initto initialize the Terraform environment and then runsterraform destroy -auto-approveto destroy the resources. The-auto-approveflag ensures non-interactive execution.when: manual: Specifies that this job should be triggered manually by a user.dependencies:: Ensures that this job depends on the successful completion of the "apply" job, meaning you can only destroy resources that have been applied by a prior "apply" job.
Step6: .gitlab-ci.yml
Full Gitlab CI/CD configuration file and add it to the repository
Click on +
Click on New file
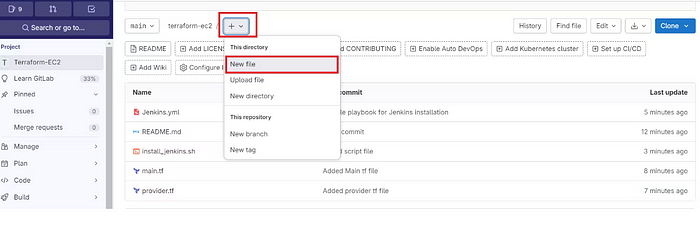
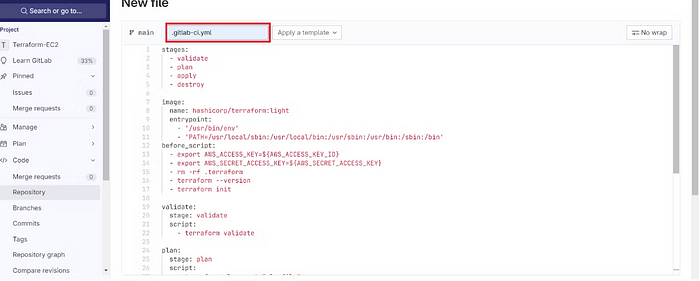
The name of the file is .gitlab-ci.yml
Copy this content and add it
stages:
  - validate
  - plan
  - apply
  - destroy

image:
  name: hashicorp/terraform:light
  entrypoint:
    - '/usr/bin/env'
    - 'PATH=/usr/local/sbin:/usr/local/bin:/usr/sbin:/usr/bin:/sbin:/bin'
before_script:
  - export AWS_ACCESS_KEY=${AWS_ACCESS_KEY_ID}
  - export AWS_SECRET_ACCESS_KEY=${AWS_SECRET_ACCESS_KEY}
  - rm -rf .terraform
  - terraform --version
  - terraform init

validate:
  stage: validate
  script:
    - terraform validate

plan:
  stage: plan
  script:
    - terraform plan -out=tfplan
  artifacts:
    paths:
      - tfplan

apply:
  stage: apply
  script:
    - terraform apply -auto-approve tfplan
  dependencies:
    - plan

destroy:
  stage: destroy
  script:
    - terraform init
    - terraform destroy -auto-approve
  when: manual
  dependencies:
    - apply
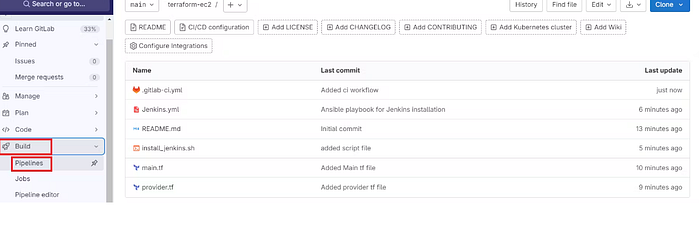
Click commit.
It will automatically start the build.
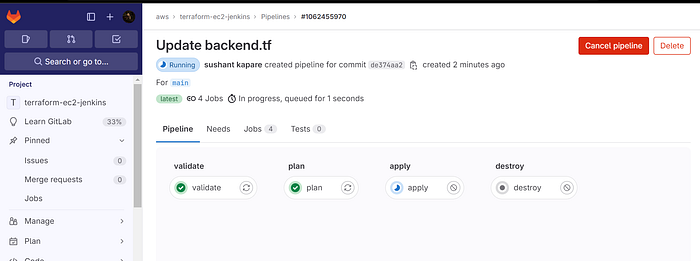
Now click on Build → Pipelines
Build started.
Click on Running or stages
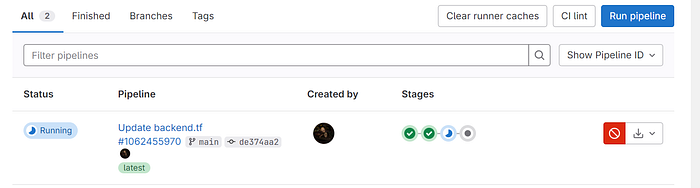
Click on validate to see the build output.
Initialized and validated terraform code.
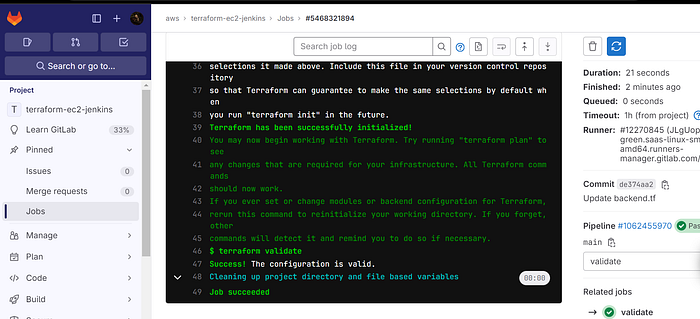
Click on Jobs to come back.
See plan output

Now come back and see apply output also.
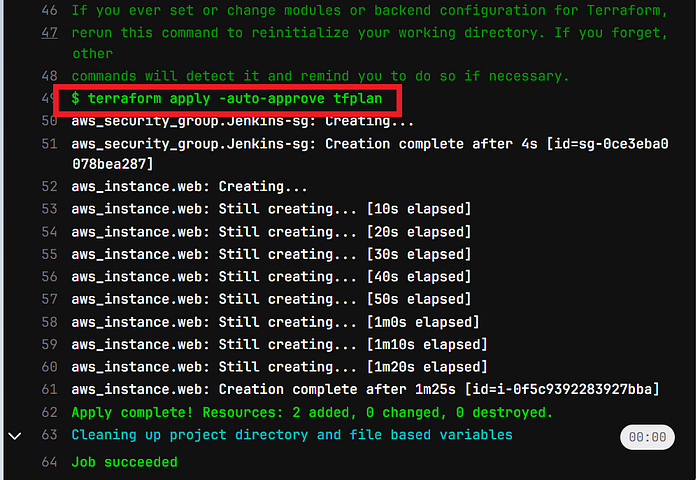
Go to the AWS console and see whether it’s provisioned Ec2 or not.
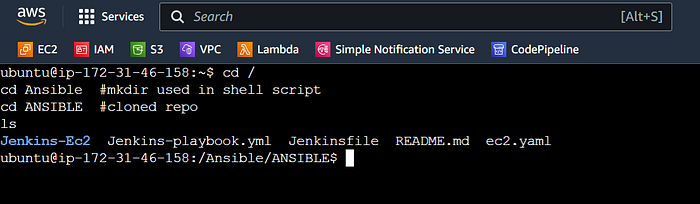
Connect the instance to Putty or Mobaxtreme.
Use the below commands
cd /
cd Ansible  #mkdir used in shell script
cd ANSIBLE  #cloned repo
ls  #to see ansible playbook
Now come back to
cd /home/ubuntu
cd /var/log/
ls
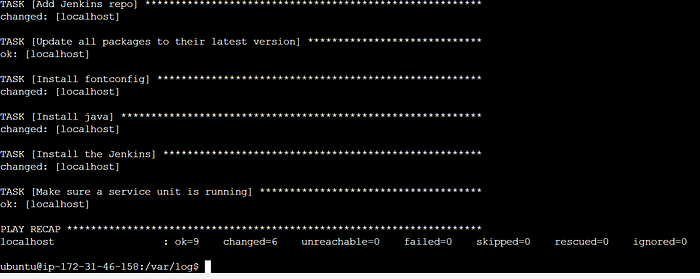
cat user-data.log
It’s completed running the Ansible playbook to install Jenkins.
Copy the public IP of the ec2 instance
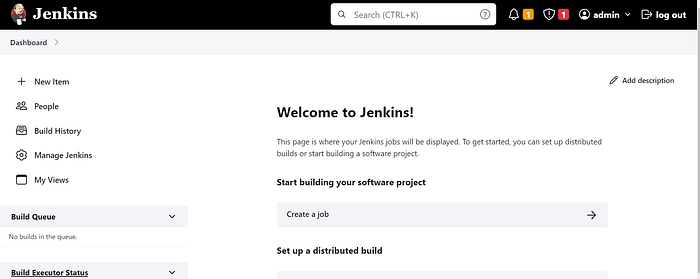
<Ec2-public-ip:8080>
sudo cat /var/lib/jenkins/secrets/initialAdminPassword
Step7: Destroy
Go back to Gitlab
We need to manually provide destroy to delete resources.
Click on >> in stages
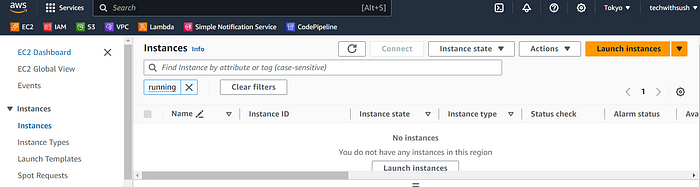
Ec2 instance should be destroy automatically
Conclusion:-
By integrating GitLab CI/CD with Terraform, you can simplify and streamline your infrastructure management. This powerful combination allows for the automation of your CI/CD pipelines, provides strong version control integration, enhances security, and promotes collaboration. Whether you are managing a small infrastructure or a complex multi-cloud environment, GitLab CI/CD for Terraform is a winning combination that will help your team achieve operational excellence and agility in today’s ever-evolving IT landscape. Start your journey towards more efficient infrastructure management today!